Monday, 24 September 2012
C++ Console Dictionary Merger Program
A couple of months ago, I wrote a program as part of a programming test, the test was to write a console program that could take 2 dictionary files (ANSI text files) and output a 3rd, that contains the words from both dictionaries in alphabetical order, with duplicates removed, for more information look at the Downloads page.
Sunday, 5 August 2012
Visual Binary Tree Winforms Application
Last year I created a Winforms application that uses 2D graphics to display binary trees, I have recently revisited it to make several improvements and bug fixes. The binary tree is compiled as a DLL, which is used by the application which has the following features:
Here are some screenshots of the application (click to zoom):


 The program demonstrates the following:
You can download the executable as well as the source by going to the downloads page.
- Node Insertion & Deletion
- All Modes of Traversal
- Customize-able Colour Scheme
- Saving & Loading of Either Colour Scheme or Tree
- Node Encryption When Saved to File
Here are some screenshots of the application (click to zoom):


- Dynamic Programming & Reflection (Requires .NET 4)
- 2D Graphics (GDI+)
- Generics
- Class Constraints
- File Handling (CryptoStream)
- LINQ
You can download the executable as well as the source by going to the downloads page.
Tuesday, 17 July 2012
XML to LINQ
For this blog post I'll be visiting the subject of using XML in .NET, in particular I'll be focusing on a single example and examine the different ways the same result can be achieved
The XML that will be the main focus of this post contains a list of football teams and a few players that play for these teams, the XML looks like this:
Lets look at the simplest method, firstly the root node needs to be created, then inside the root node each Team can be added:
means that each Team the query returns is added as a child element to Teams. To add the Players to each team, a list of Player element nodes needs adding to the inner XElement (children of each Team element) for each Team evaluated by the query, and the team ID needs to be matched to the ID referenced by each Player, the following shows the complete query:
Please note that the following namespaces need to be referenced to execute the above code: System.Linq & System.Xml.Linq.
The XML that will be the main focus of this post contains a list of football teams and a few players that play for these teams, the XML looks like this:
<Teams>
  <Team Name="Manchester United">
    <Player>Valencia</Player>
    <Player>Rooney</Player>
    <Player>Young</Player>
  </Team>
  <Team Name="Barcelona">
    <Player>Messi</Player>
  </Team>
  <Team Name="Chelsea">
    <Player>Lukaku</Player>
  </Team>
  <Team Name="Real Madrid">
    <Player>Alonso</Player>
    <Player>Pepe</Player>
  </Team>
  <Team Name="Inter Milan">
    <Player>Pazzini</Player>
    <Player>Sneijder</Player>
  </Team>
  <Team Name="Bayern Munich">
    <Player>Robben</Player>
  </Team>
</Teams>
The classes and class fields that will represent the nodes will be as follows:
class Player
{
    public string Name { get; private set; }
    public int TeamID { get; private set; }

    static public Player[] CreateArray(string[] playerNames, int[] teamIDs)
    {
        Player[] arr = new Player[playerNames.Length];

        for (int i = 0; i < arr.Length; ++i)
            arr[i] = new Player { Name = playerNames[i], TeamID = teamIDs[i] };

        return arr;
    }
}

class Team
{
    public int ID { get; private set; }
    public string Name { get; private set; }

    static public Team[] CreateArray(string[] teamNames)
    {
        Team[] arr = new Team[teamNames.Length];
        int id = 1;

        for (int i = 0; i < arr.Length; ++i)
            arr[i] = new Team { ID = id++, Name = teamNames[i] };

        return arr;
    }
}
Then the data can be created by using the static CreateArray methods for each class as follows:
string[] teamNames = new[] {"Manchester United", "Barcelona", "Chelsea",
 "Real Madrid", "Inter Milan", "Bayern Munich" };

string[] playerNames = new [] {"Valencia", "Rooney", "Robben",
    "Pazzini", "Messi", "Alonso", "Young", "Pepe", "Lukaku", "Sneijder"};
int[] playerTeamIDs = new[] { 1, 1, 6, 5, 2, 4, 1, 4, 3, 5 };

Team[] teams = Team.CreateArray(teamNames);
Player[] players = Player.CreateArray(playerNames, playerTeamIDs);
An ID is defined for each team, and an ID for each player which acts as the foreign key, which creates a one-to-many relationship between a team and its players. The static methods are there so it is possible to create several teams and players without having to create each one individually.Lets look at the simplest method, firstly the root node needs to be created, then inside the root node each Team can be added:
new XElement("Teams", from team in teams
       select new XElement("Team", new XAttribute("Name", team.Name)));
The XElement constructor accepts an arbitrary number of XML entities, meaning that passing in a query as a parameter which returns an IEnumerable
XElement teamPlayersXML = new XElement("Teams", from team in teams
                                                    select new XElement("Team", new XAttribute("Name", team.Name),
                                                        from player in players
                                                        where player.TeamID == team.ID
                                                        select new XElement("Player", player.Name)));
The query translates roughly into the following (fluent syntax):
XElement teamPlayersXML = new XElement("Teams",
            teams.Select(t => new XElement("team", new XAttribute("Name", t.Name),
                players.Where(p => p.TeamID == t.ID)
                       .Select(p => new XElement("player", p.Name)))));
Now lets look at how grouping can be used to produce the same XML, this is done by first joining each Player with each Team using the IDs as the key. Now the Players can be grouped into each Team, using an enumeration of objects of a class that implements the generic ILookup interface (that in turn implements the generic IEnumerable interface with the generic argument being a generic IGrouping which specifies both the element and key type as type arguments), then each grouping can be enumerated as follows:
XElement teamPlayersXML = new XElement("Teams", from team in teams
                                                join player in players
                                                on team.ID equals player.TeamID
                                                group player by team into grp // Bind each groping into grp (team & player will no longer be in scope)
                                                select
                                                    new XElement("Team", new XAttribute("Name", grp.Key.Name),
                                                        from g in grp // enumerate each Player stored in a group
                                                        select
                                                            new XElement("Player", g.Name)));
The equivalent in fluent syntax is as follows:
XElement teamPlayersXML = new XElement("Teams", teams.Join(players, t => t.ID, p => p.TeamID, (p, t) => new { p, t })
                                                     .GroupBy(x => x.p, x => x.t)
                                                     .Select(x => new XElement("Team", new XAttribute("Name", x.Key.Name), x.Select(pair => new XElement("Player", pair.Name)))));
As you may have already guessed, the first method is much faster since no grouping is being used. Now here is the first query using an iterative approach rather than using LINQ:
XElement root = new XElement("Teams");
XElement currentElement = null;

foreach (Team team in teams)
{
    currentElement = new XElement("Team", new XAttribute("Name", team.Name));

    foreach (Player player in players)
    {
        if (player.TeamID == team.ID)
            currentElement.Add(new XElement("Player", player.Name));
    }

    root.Add(currentElement);
}
Using a System.Diagnostics.Stopwatch to compare the first LINQ query to the iterative method. It is actually the iterative method that executes faster, on my machine the LINQ method takes ~1.9ms, while the iterative approach takes ~0.5ms (I also tested with 1,000 Teams and 11,000 Players and the LINQ method took ~225ms while the iterative method took ~205ms). This is most likely due to the extra overhead when executing the query that is adding to and returning an enumeration as well as iterating it when adding each child node.Please note that the following namespaces need to be referenced to execute the above code: System.Linq & System.Xml.Linq.
Tuesday, 10 July 2012
Simple Binding in WPF
For the last few weeks I have been learning WPF and I decided to introduce the concept of binding in WPF.
What is it?
In its most simple form, binding is a technique used to synchronize one property with another either on the same element or on two completely different elements. The Binding class is what is known as a Markup Extension class, in XAML these are defined by the use of curly braces when set as an attribute of an element - it allows the use of positional and named parameters as with .NET attribute definitions, or by using property element syntax (defining an XAML attribute as an XAML child element). Let's take a look at an example of binding the content on a label to the text on a textbox:
 The binding class has a default constructor, but it also has a constructor that accepts a single parameter - the string for the property path, so here is a better way of writing the binding string above, using Path as the positional parameter, and ElementName as the named parameter:
 Notice that the value of the RelativeSource property is in curly braces, this is because RelativeSource is also a Markup Extension class, where the positional parameter Mode is set to Self.
When an item is selected, the background of the selected item will be set to the background of the ComboBox itself, but no item is originally selected so the background will be originally set to null (completely transparent). To fix this I will use the FallbackValue property when binding, this allows us to specify a value will be set if binding to the specified path fails (in this case it fails because SelectedItem is initially null). Because there is no simple string value that converts into a complex LinearGradientBrush (the default background of a ComboBox and other Windows controls), the binding on the background can be created by using property elements, this means properties can have more complex values, here is how it is done:
What is it?
In its most simple form, binding is a technique used to synchronize one property with another either on the same element or on two completely different elements. The Binding class is what is known as a Markup Extension class, in XAML these are defined by the use of curly braces when set as an attribute of an element - it allows the use of positional and named parameters as with .NET attribute definitions, or by using property element syntax (defining an XAML attribute as an XAML child element). Let's take a look at an example of binding the content on a label to the text on a textbox:
<StackPanel Width="200" xmlns="http://schemas.microsoft.com/winfx/2006/xaml/presentation">
  <TextBox Name="txt"/>
  <Label Content="{Binding ElementName=txt, Path=Text}" />
</StackPanel>
<Label Content="{Binding Text, ElementName=txt}" />
You can use the Path property the same way you access properties in code (eg. List.Count), the folloowing example shows this in action as well as binding to a property on the same element:
<StackPanel Width="200" xmlns="http://schemas.microsoft.com/winfx/2006/xaml/presentation">
  <ComboBox Background="{Binding SelectedItem.Background, RelativeSource={RelativeSource Self}}">
    <ComboBoxItem Background="Red">Red</ComboBoxItem>
 <ComboBoxItem Background="Green">Green</ComboBoxItem>
 <ComboBoxItem Background="Blue">Blue</ComboBoxItem>
  </ComboBox>
</StackPanel>

When an item is selected, the background of the selected item will be set to the background of the ComboBox itself, but no item is originally selected so the background will be originally set to null (completely transparent). To fix this I will use the FallbackValue property when binding, this allows us to specify a value will be set if binding to the specified path fails (in this case it fails because SelectedItem is initially null). Because there is no simple string value that converts into a complex LinearGradientBrush (the default background of a ComboBox and other Windows controls), the binding on the background can be created by using property elements, this means properties can have more complex values, here is how it is done:
<StackPanel Width="200" xmlns="http://schemas.microsoft.com/winfx/2006/xaml/presentation">
  <ComboBox>
    <ComboBox.Background>
      <Binding>
        <Binding.Path>SelectedItem.Background</Binding.Path>
        <Binding.RelativeSource>
          <RelativeSource Mode="Self"/>
        </Binding.RelativeSource>
        <Binding.FallbackValue>
          <LinearGradientBrush StartPoint="0,0" EndPoint="0,1">
            <GradientBrush.GradientStops>
              <GradientStopCollection>
                <GradientStop Color="#FFF" Offset="0.0"/>
                <GradientStop Color="#CCC" Offset="1.0"/>
              </GradientStopCollection>
            </GradientBrush.GradientStops>
          </LinearGradientBrush>
        </Binding.FallbackValue>
      </Binding>
    </ComboBox.Background>

    <ComboBoxItem Background="Red">Red</ComboBoxItem>
    <ComboBoxItem Background="Green">Green</ComboBoxItem>
    <ComboBoxItem Background="Blue">Blue</ComboBoxItem>
  </ComboBox>
</StackPanel>
Now the ComboBox will have its default background colour again until an item is selected.
Tuesday, 5 June 2012
Spearman's Rank Correlation Coefficient in F#
I have recently started to learn F#. I decided to write the same program as in the previous post to test what I'd learnt so far, I've commented the program well so there is no real need for me to give additional explanations.
On inspecting the performance of both C# and F# versions (using System.Diagnostics.Stopwatch), F# came in at just a few milliseconds faster than the C# version. Note also that I used type annotation for the 2 array parameters to constrain the array to type int.
let calcCoeff (setX : int[]) (setY : int[]) =
    let GetRanks set n =

        // Parameters:
        // ranks:    the output list of the ranks, it is infered with type float
        //           due to the float division in the 2nd statement
        // freq:     the occurances of the same value in the list
        // curRank:  the current rank starting from n increasing to 1
        // acc:      the sum of the repeated values in the set, this value is divided
        //           by freq to calculate the shared rank between more than 1 value
        // set:      the sorted set of data (implicitly passed into the function as
        //           this is used with pattern matching)

        let rec CalculateRanks ranks freq curRank acc = function
            | [] -> List.toArray(ranks)
            | hd :: tl when tl <> [] && tl.Head = hd -> CalculateRanks ranks (freq+1) (curRank - 1) (acc + curRank) tl
            | hd :: tl when freq > 1 -> CalculateRanks ((List.replicate freq ((float(acc + curRank)) / float(freq))) @ ranks) 1 (curRank-1) 0 tl
            | hd :: tl -> CalculateRanks (float(curRank) :: ranks) 1 (curRank-1) 0 tl

        let sorted = Array.sort(set)

        // Create a new array, containing the values and ranks as pairs (2-value tuple)
        // The array returned needs reversing as the cons operator (::) prepends an item to the list
        let ranks = Array.zip (Array.rev(CalculateRanks [] 1 n 0 (Array.toList sorted) )) sorted

        // Create a blank array with the same amount of elements
        let orderedRanks = Array.zeroCreate n

        // Find the value in the original list by searching for the value
        // (2nd item in the tuple (snd) and take the rank (1st item in the tuple (fst))
        for i in 0 .. n-1 do
            let originalIndex = Array.findIndex (fun x -> snd x = set.[i]) ranks
            orderedRanks.[i] <- (fst ranks.[originalIndex])

        orderedRanks

    if setX.Length <> setY.Length then raise (new System.ArgumentException("Both collections of data must contain an equal number of elements"))

    let n = setX.Length
    let ranksX = GetRanks setX n
    let ranksY = GetRanks setY n

    let sigmaDiff = (Array.zip ranksX ranksY) |> Array.sumBy (fun x -> (fst x - snd x) ** 2.0)
    1.0 - ((6.0 * sigmaDiff) / ((float(n) ** 3.0) - float(n)))

let main() =
    let setX = [| 72; 112; 46; 97; 46; 46; 52 |]
    let setY = [| 20; 2; 7; 11; 4; 12; 7 |]

    let rho = calcCoeff setX setY

    printfn "Spearman's Rank Correlation Coefficient: %f" rho

main()
Spearman's Rank Correlation Coefficient: -0.062500On inspecting the performance of both C# and F# versions (using System.Diagnostics.Stopwatch), F# came in at just a few milliseconds faster than the C# version. Note also that I used type annotation for the 2 array parameters to constrain the array to type int.
Tuesday, 15 May 2012
Calculating Correlation Using LINQ
Recently I looked over my old A level maths notes, something that I was looking at was statistics and correlation. As a LINQ test, I wrote a simple algorithm that calculates the Spearman's Rank Correlation Coefficient.
The Spearmans Rank Correlation Coefficient is one of the several correlation calculations used to calculate the 'strength' of a relationship between 2 sets of data, this calculated value is in the range -1..1. For more information on correlations look here.
It works by giving each value in each set of data a rank between 1 and at most n (in descending order), if 2 or more values are eqaul then the rank is averaged between these values, so for instance a set of 7 values and the respective ranks:
As you can see the value of 46 is given the rank 6, because (5+6+7)/3 = 6, now that I have described how sets of values are ranked, lets look at the equation:
 Where d = the difference in rank between the 2 sets of data, n = the number of values in each set (7)
So using the example above as our first set if we now include a second set of data (must also be 7 values):
As before the value 7 shares 4th and 5th (4+5/2). Now we can sum the squares of the differences between ranks:
= 22 + -62 + 1.52 + -12 + 02 + 42 + -0.52
= 4 + 36 + 2.25 + 1 + 0 + 16 + 0.25
= 59.5
This gives a final result of: ρ = -0.0625 (a very slight negative correlation). Now the write a program which can calculate this for LINQ, firstly we need to order the values in descending order, numbered from 1 to n, the best way to do this is by using fluent syntax, as this supports the selecting of a value along with its index (something that isn't possible with query syntax). We then can group the values if the numbers are the same:
The Spearmans Rank Correlation Coefficient is one of the several correlation calculations used to calculate the 'strength' of a relationship between 2 sets of data, this calculated value is in the range -1..1. For more information on correlations look here.
It works by giving each value in each set of data a rank between 1 and at most n (in descending order), if 2 or more values are eqaul then the rank is averaged between these values, so for instance a set of 7 values and the respective ranks:
| x | 72 | 112 | 46 | 97 | 46 | 46 | 52 |
|---|---|---|---|---|---|---|---|
| rx | 3 | 1 | 6 | 2 | 6 | 6 | 4 |
As you can see the value of 46 is given the rank 6, because (5+6+7)/3 = 6, now that I have described how sets of values are ranked, lets look at the equation:

So using the example above as our first set if we now include a second set of data (must also be 7 values):
| y | 20 | 2 | 7 | 11 | 4 | 12 | 7 |
|---|---|---|---|---|---|---|---|
| ry | 1 | 7 | 4.5 | 3 | 6 | 2 | 4.5 |
As before the value 7 shares 4th and 5th (4+5/2). Now we can sum the squares of the differences between ranks:
= 22 + -62 + 1.52 + -12 + 02 + 42 + -0.52
= 4 + 36 + 2.25 + 1 + 0 + 16 + 0.25
= 59.5
This gives a final result of: ρ = -0.0625 (a very slight negative correlation). Now the write a program which can calculate this for LINQ, firstly we need to order the values in descending order, numbered from 1 to n, the best way to do this is by using fluent syntax, as this supports the selecting of a value along with its index (something that isn't possible with query syntax). We then can group the values if the numbers are the same:
double[] rankings = (from n in values
   join grp in groupedValues on n equals grp.Key
   select grp.Average(g => g.IndexedRank)).ToArray();
With the rankings we can combine them and the calculate the sum of the differences by using aggregation:
int n = rankings.Length;

// Note that I have expanded the n^2(n - 1) to use less code
double rho = 1 - ((6 * sigmaDiff) / (Math.Pow(n, 3) - n));
Putting it all together, using our 2 sets as a test harness:
using System;
using System.Collections.Generic;
using System.Linq;

public static class Extensions
{
    public static double SpearmansCoeff(this IEnumerable<int> current, IEnumerable<int> other)
    {
        if (current.Count() != other.Count())
            throw new ArgumentException("Both collections of data must contain an equal number of elements");

        double[] ranksX = GetRanking(current);
        double[] ranksY = GetRanking(other);

        var diffPair = ranksX.Zip(ranksY, (x, y) => new { x, y });
        double sigmaDiff = diffPair.Sum(s => Math.Pow(s.x - s.y, 2));
        int n = current.Count();

        // Spearman's Coefficient of Correlation
        // ρ = 1 - ((6 * sum of rank differences^2) / (n(n^2 - 1))
        double rho = 1 - ((6 * sigmaDiff) / (Math.Pow(n, 3) - n));

        return rho;
    }

    static double[] GetRanking(IEnumerable<int> values)
    {
        var groupedValues = values.OrderByDescending(n => n)
                                  .Select((val, i) => new { Value = val, IndexedRank = i + 1 })
                                  .GroupBy(i => i.Value);

        double[] rankings = (from n in values
                             join grp in groupedValues on n equals grp.Key
                             select grp.Average(g => g.IndexedRank)).ToArray();

        return rankings;
    }
}

class Program
{
    static void Main(string[] args)
    {
        int[] setX = { 72, 112, 46, 97, 46, 46, 52 };
        int[] setY = { 20, 2, 7, 11, 4, 12, 7 };

        double rho = setX.SpearmansCoeff(setY);

        Console.WriteLine("Spearman's Rank Correlation Coefficient: {0}", rho);
    }
}
Spearman's Rank Correlation Coefficient: -0.0625
Sunday, 6 May 2012
My LED Clock Custom Control
I've been working on my own custom control project that I started more toward the beginning of the year (in C#), but I've contiuned with it a few weeks ago. The control is pretty much complete, I will release the binary (DLL) to it soon, as there are code improvements I need to make to it first, as well as compatibility with otherr versions of the .NET framework.
The LED clock supports 3 modes; Clock, Stopwatch and Countdown. The clock is drawn procedurally on the graphics object of a blank control and uses simple bit masking to draw the digit segments:
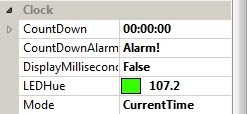
 The clock also provides a few design-time properties such as countdown time, LED colour (hue). mode, alarm clock message (a string passed to a custom 'CountdownEventArgs' object for event firing when the countdown timer reaches 0), and an option to also display milliseconds:
 The clock control is automatically scaled when it is resized (using ScaleTransform(float, float), I decided to use anti-aliasing using the System.Drawing.Graphics.SmoothingMode enumeration, as this prevents 'rough edges' when the control is enlarged, it also creates a slight LED effect, I've also changed the colour to cyan to show it in a different colour, as well as setting it to stopwatch mode (notice that the top-left segment on the tens of hours digit is now showing (as both stop watch and countdown modes count to 99:59:59)):

The LED clock supports 3 modes; Clock, Stopwatch and Countdown. The clock is drawn procedurally on the graphics object of a blank control and uses simple bit masking to draw the digit segments:


Saturday, 28 April 2012
First Post...
Hi everyone, this is my first ever blog so please forgive me if the design is lacking slightly.
I completed my 4 year degree within the field of Game Programming in 2010, the reason I chose the degree course was down to the fact that I was more interested in learning programming to a higher level, more than what a traditional CompSci\Software degree would offer.
Since finishing my degree I have tweaked my job goals slightly, and am now looking for work within .NET (C#\VB.net - Winforms) and SQL. Although I now work as a website content admin for an online rugs business (part-time), I am still looking for work within the software industry.
Subscribe to:
Posts (Atom)